The scene to render is read from an ascii or binary file called the .mi file. It contains a list of commands and frames. Commands are instructions to mental ray that set options such as verbosity or external shaders to be linked; frames describe scenes to render. Each frame describes one image; files containing multiple frames are used to describe multi-frame animations. Each frame contains a view, describing the camera and other global setups, the materials, lights, and textures, and the geometric objects.
The sequence runs like this:
    list of commands
    frame numberint [time]
        list of lights, textures, and materials
        view
        list of lights, textures, materials, and objects
    end frame
    list of commands
    frame numberint
        ...             # frame body
    end frame
    ...                 # more commands and frames
The frames describe the scene to be rendered. Everything between a frame and end frame pair describes a complete scene that is interpreted, rendered, and written to output files before starting with the next frame. Frames are largely independent of one another (one notable exception is the optional field rendering mode, which combines pairs of frames into a single image by interlacing scanlines). The frame contains:
- (see light) Lights that illuminate certain objects. Lights are referenced in materials only, they are not applied directly to objects. All lights name a shading function; there are predefined shaders for points, spots, and directional lights, optionally in combination with various types of area light sources.
- (see texture) Textures to apply 2D or 3D color, bump, transparency, displacement, and other maps to objects. Textures are also referenced by materials only; their interpretation is up to the material shader. Textures may appear verbatim in the file, or may be read from a texture file, or may be fully procedural, or a combination of textures.
- Materials describe the color, transparency, reflection, and other properties of objects, in addition to listing lights and textures. Materials name several shading functions for material properties, shadow casting, environment mapping, volume shading (see volume shader) , displacement mapping, as well as a number of property flags.
- The view is a description of the camera along with other global rendering parameters, such as image resolution and output file names.
The ``#'' character introduces comments, unless quoted. Comments extend to the end of the line. Whitespace is ignored.
This section discusses the parts that make up an .mi file. In this section, a less formal syntax is used for the syntax description: a bar ``|'' denotes alternatives, items enclosed in tall square brackets ``[ ]'' are optional, and the ellipsis ``...'' denotes omission. Literal text is set in teletype, while variable metasymbols are set in italics. All other punctuation characters are literals. Strings are quoted with double quotes; this includes all names. Names, such as material, light, or object names, need not be quoted, but it is highly recommended to avoid conflicts with reserved words (future versions may reserve more words than described in this manual), and to allow non-alphabetic characters. Without quotes, only lowercase and uppercase letters, underscores, and digits may be used; a digit may not be the first character of an unquoted name. No such restrictions apply to quoted names.
Integers are distinguished from floating point numbers by appending the suffix int, as in degreeint. Integers are an optional ``+'' or ``-'' sign followed by a sequence of digits ``0'' through ``9''. Floating-point numbers follow the same rules, but always contain either a decimal point ``.'' with at least one digit before and at least one digit after the decimal point. Strings can be distinguished from numbers because the grammar always forces them to be enclosed in double quotes.
$include "filename"
This command is different from all others in that it can appear at any place in the file, not just between frames. The $ must appear in column 1 of the line. The named file is included (pasted into) the .mi file, replacing the $include statement. Includes can be nested. The main purpose is to include declarations (see below), but materials, light sources, even objects can be included. The included file is read on the client host only; the included file need not exist on any remote hosts that help render the scene.
version "string"
This commands informs mental ray that this .mi file requires mental ray version string or later. Version strings consist of four numbers separated with dots, such as "1.2.3.4". The string can underspecify the version, as in "1.9". Missing numbers are implicitly assumed to be 0 so "1.9" becomes "1.9.0.0". Each number, beginning with the first, is checked in turn. If the number in the string is greater than the version number built into mental ray, an error message is printed and mental ray aborts; otherwise the next number is considered. If all given numbers pass the test, mental ray continues. This command is recommended for declaration files included with $include.
verbose on|off
This command turns verbose messages on or off. Default is off. If verbose mode is enabled, objects found in the frame are listed as they are parsed, progress reports are printed during rendering, and time and memory statistics are printed after rendering has finished. Verbose messages can slow down mental ray significantly while parsing. The verbose command can be overridden with the -verbose command-line option.
echo "message"
The named message, which must be enclosed in double quotes, is printed to stdout. The echo command is executed during parsing. Parsing is done frame-by-frame, rendering takes place when a frame ends. This means that echo statements between frames are not printed until the preceding frame has been rendered. Echoing is independent of the verbose mode.
system "shell_command"
This command starts a shell, which executes the named shell_command. The shell command must be enclosed in double quotes. mental ray waits until the shell command has completed; this can be defeated by ending the command with a shell & command. The system command, like echo, is executed while parsing, not during rendering. Its main purpose is writing finished pictures to an output device.
memory maxmemint
The memory command limits the maximum resident set of mental ray to maxmem megabytes, on systems that support resource limits. Only the maximum amount of physical RAM used is limited, not the maximum amount of virtual memory. This means that swapping to disk may be increased if RAM runs out. This can be used to partition available physical RAM among multiple processes, because it prevents mental ray from grabbing all available space. This command can be overridden with the -memory command-line option. See also the discussion of the subdivision_memory statement in the view statement, below.
code "filename"
(see shader parameters) (see state variables) The named filename is interpreted as a C source file, ending with the extension ``.c'', is compiled and linked into mental ray. From this point on, the shaders it defines are available in mental ray as shading functions. For example, if the source defines a C function myshader, with the usual three parameters result, state, and paras (see the section on writing shaders for details), the name myshader may be used in materials, lights, textures and so on as the quoted shader name, just like one of the built-in shaders like soft_material or mi_wave_light. The command-line option -code provides an alternative way of compiling and linking C source. Multiple code commands are possible. Note that every shading function must also be declared; see below.
link "filename"
Like the code command, the link command attaches external shaders to mental ray, which can then be used as shading functions. While the code command accepts ``.c'' files as filename, the link command expects either object files ending in ``.o'', or dynamic shared object (DSO) files ending in ``.so''. Object files are linked, while DSOs are just attached without any preprocessing. DSOs are the fastest way of attaching an external shader, and require no compilers or development options, which are sometimes sold separately by system vendors.For system and development software requirements, see the Release and Installation Notes. However, not all systems support DSOs. The -link command-line option provides an alternative way of linking objects files and DSOs. Any number of files can be linked. Note that every shading function must also be declared; see below. If Dynamical Shared Objects (DSOs) are to be linked on SGI machines, the LD_LIBRARY_PATH environment variable must include the path of the .so file to be linked; see ``Dynamic Linking of Shaders''.
declare "shader_name" (parameters)
(see shader declaration) (see shader parameters) All shading functions linked with a code or link statement, and all shading functions built into mental ray must be declared. Shading functions accept a pointer to an arbitrary parameter structure as their third argument, and mental ray must know the structure declaration in order to put together the parameter block according to C structure layout conventions. Usually, declarations are included from a separate file using the $include statement. For a detailed description of the parameters part of the declaration, see the section on writing shaders.
     scalar|color texture "texture_name"
                 [widthint heightint [depthint] ] bytes ...
     vector texture "texture_name"
                 [widthint heightint ] bytes ...
     [ local ] scalar|color|vector texture "  texture_name"
                 "filename"
     scalar|color|vector texture "texture_name"
                 "shader_name" (parameters)
     scalar|color texture "  texture_name" [widthint heightint [depthint] ] bytes ...
     vector texture "  texture_name" [widthint heightint ] bytes ...
     [ local ] scalar|color|vector texture "  texture_name" "filename"
     scalar|color|vector texture "  texture_name" "shader_name"  (parameters)
(see texture) (see procedural texture) (see image texture) (see texture shader) Textures are normally defined in a frame, as part of the frame_description list. These textures are available for the duration of the frame, and are unloaded from memory when the frame has completed. Textures can also be defined outside frames. These textures are called global textures, and can be used in all following frames. Global textures are never unloaded from memory until mental ray terminates. For a description of the syntax, see the in the Textures subsection below.
    frame frame_numberint [frame]
        frame_description
    end frame
This command defines a frame, and renders it when the end frame is reached during parsing. During rendering, only shaders that were compiled and/or linked and declared are available for this frame. The next section describes the frame_description in detail. The frame_number is a sequential number, usually starting with 1, that distinguishes multiple frames in the file. Among other things, it is used for field rendering. The optional time gives the frame number as a time in seconds; it relates to the frame number and the desired frame rate. It is available to shaders for animations. The default is 0.0.
A frame describes a single scene. It contains a camera (called a view), materials, textures, lights, and objects. The frame consists of a list of items of these five types in any order, with the restriction that the view must precede the first object, and that materials, lights, and textures must be defined before they are being used. Lights will normally precede the view because some types of lens shaders (such as the lens flare shader) need a list of lights as shader parameters. Since textures and lights are usually referenced in materials, they must precede the materials they are used in. In all these cases, an item is ``used'' when it is named as a parameter of a shader.
A detailed description of the five types that make up a frame follows. The view is listed last. It has a large list of parameters, most of them optional. The other types are mostly simple, all the complexity and cross-references are hidden in the shading functions. A material, for example, does not list the lights that illuminate it directly; the list appears as a shader parameter. For a description of shading functions, see the section on writing shaders, or the chapter on built-in shaders.
    light "light_name"
        "shader" (parameters)
        [ area_light_primitive ]
        [ origin x y z ]
        [ direction dx dy dz ]
    end light
This statement defines a light source. All light sources need a light shader, such as the built-in soft_light or mi_wave_light shaders, or a shader linked with a code or link command (see above). "shader" above stands for the quoted name of the shader. Like any other shader, a parameter list (see shader parameters) enclosed in parentheses must be given. The parameters depend on the particular shader; they include the light color, attenuations, and spot light directions. The declaration of the shader determines which parameters are available in the parameters list; see the section ``User Parameter Declarations'' for details on shader parameters. mental ray distinguishes two kinds of light shaders: point lights, giving off light in all directions; directional (infinite) lights, whose light rays are all parallel in a particular direction. Point lights must define an origin but no direction, while directional lights must define a direction but no origin. Spot lights (see spot light) are a variation of point lights whose shader imposes a directional attenuation. That directional attenuation is purely a function of the shader, it is independent of the direction keyword in the light definition.
After the definition, the light source can be referenced in parameter lists of shading functions (such as a material shading function) by listing light_name. Material shading functions usually have an array parameter accepting one or more light_names, which they loop over to accumulate the contribution by each light. Lights are one of the standard data types that are available for shading function parameters. The light_name may be quoted to avoid clashes with predefined words, and to allow non-alphabetic characters.
Any point or spot light may be turned into an area light source by naming an area_light_primitive. Area light sources generate soft shadows because shadow-casting objects may partially obscure the light source. Three types of area light primitives are supported:
    rectangle x0 y0 z0 x1 y1 z1 [ u_samples v_samples ]
    disc x y z radius [ u_samples v_samples ]
    sphere radius [ u_samples v_samples ]
All three area light types are centered at the origin position in the light definition. A rectangular area light is specified by two vectors from the center to two edges; a disc area light is specified by its normal vector and a radius, and a sphere area light is specified only by its radius. Note that the orientation of the rectangle or the disc are independent of the direction and any directional attenuation the shader applies.
The u_samples and v_samples parameters subdivide the area light source primitive. For discs and spheres, u_samples subdivides the radius and v_samples subdivides the angle. When sampling the area light source, mental ray samples one point in each subdivision at a location precisely determined by the sample parameters and a predefined lighting distribution, and then combines the results. The default is 3 for each sample parameter, so an area light source without explicitly given samples parameters is sampled 9 times.
    scalar texture "texture_name" [widthint heightint [depthint] ] bytes ...
    [ local ] scalar texture "texture_name" "filename"
    scalar texture "texture_name" "shader_name"  (parameters)
    color texture "texture_name" [widthint heightint [depthint] ] bytes ...
    [ local ] color texture "texture_name" "filename"
    color texture "texture_name" "shader_name"  (parameters)
    vector texture "texture_name" [widthint heightint ] bytes ...
    [ local ] vector texture "texture_name" "filename"
    vector texture "texture_name" "shader_name"  (parameters)
Textures are lookup functions. They come in two flavors: lookups of two-dimensional texture or picture files or literal bytes, and procedural lookups. File textures require a file name parameter or a byte list; procedural textures require a shading function parameter. There are three types of texture functions: textures computing scalars, colors, and vectors. Which one is chosen depends on what the texture is used for. Textures are used as parameters to other shaders, typically material shaders. A material shader could, for example, use a color texture to wrap a picture around an object, or a scalar texture as a transparency or displacement map, or a vector texture as a bump map. The actual use of the texture result is entirely up to the shader that uses the texture. The built-in SOFTIMAGE material shader soft_material, for example, uses arrays of color textures only.
All of the above syntax variations define a texture texture_name. The texture_name should be quoted to avoid reserved words or to allow non-alphabetic characters. This is the name that the texture will later be referenced as. The name is valid only in the current frame, and the texture will be unloaded from memory at the end of the frame. To avoid this, the texture definition can be made global by moving it outside the frame definition, which makes it a command like declare or $include. The statement syntax does not change; see above. This is useful for textures that do not change during an animation.
Non-procedural textures can be defined by specifying the width and height of the texture and an optional depth (bytes per component, 1 or 2, default is 1), followed by a list of width * height *depth hexadecimal two-digit bytes, most significant digit first if depth is 2, in RGBA order for colors and UV order for vectors. Note that the brackets around the sizes are literally part of the .mi file, while the skinny brackets around depth denote that the depth is optional and are not part of the .mi file.
Non-procedural textures can also be defined by naming a texture or picture file; for a list of allowed file formats, see the section on Available Output File Formats. In this case, the sizes (width, height, and depth) are read from the file. If the local keyword is not present, the file is read once on the master host and then transmitted over the network to all slave hosts that participate in the rendering. With the local keyword, only the file name is transmitted to the slave hosts; this requires the filename to be valid on all slave hosts but reduces network transfer times drastically if many texture files or very large texture files are used. Maximum speed improvements are achieved if filename is not on an NFS-mounted file system (NFS stands for Network File System, distinguishable by the nfs type in the output from the Unix df command).
Procedural textures are defined by naming a shading function with parameters; the shading function can either be one of the built-in functions or an external function from a code or link command.
When the material shader (or any other shader) evaluates a texture by calling a texture evaluation function provided by mental ray, mental ray either looks up non-procedural shaders by looking up the texture in the range [0, 1] in each dimension, or it calls the named shader in the procedural case. The shader is free to interpret the point for which it evaluates the texture in any way it wants, two-dimensional or three-dimensional.
    material "material_name" [nocontour] [opaque]
        "material_shader_name" (parameters)
        [displace "displace_shader_name" (parameters)]
        [shadow "shadow_shader_name" (parameters)]
        [volume "volume_shader_name" (parameters)]
        [environment "environment_shader_name" (parameters)]
    end material
Materials determine the look of geometric objects. They are referenced by material_name in the geometry definition in object statements (see below). Lights and textures cannot be referenced by objects; they are referenced by the material which uses them to compute the color of a point on the object's surface. All built-in material shaders accept textures and lights as shader parameters.
When a primary ray cast from the camera hits an object, that object's material shader is called. The material shader then calculates a color (and certain other optional values such as labels, depths, and normals that can be written to special output files). This color may then be modified by the optional volume shader if present. The resulting color is stored in the output frame buffer, which is written to the output picture file when rendering has finished. In order to calculate the color, the material shader may cast secondary (see secondary ray) reflection, refraction, or transparency rays, which in turn may hit objects and cause other (or the same; multiple objects may share a material) material shaders to be called. The material shader bases the decision whether to cast secondary rays on its parameters, which are part of the scene description and may contain parameters such as the material's diffuse color or its reflectivity and transparency, light sources, and textures. The parameters depend entirely on the material shader. In this sense, material shaders are ``primary'' shaders that get help from ``secondary'' texture and light shaders.
(see shader parameters) The material_name should be quoted to avoid reserved names or if it contains non-alphabetic characters. The nocontour flag, if present, prevents the contour line rendering option from drawing a contour line at any point on an object that uses this material. The opaque flag, if present, informs mental ray that this material is not transparent (i.e., it does not cast refraction or transparency rays and always sets its alpha result value to 1); this allows certain optimizations that improve rendering speed. The material shader and its parameters are mandatory.
There are several optional functions that can be listed in a material. The displacement shader is a function returning a scalar that displaces the object's surface in the direction of its normal. In version 1.9, displacements are possible only on free-form surfaces, which must have a sufficiently fine approximation to reveal details of the displacement map. Polygons and polygon meshes can be displaced in version 2.0 of mental ray.
The shadow shader is called when a shadow calculation is done, and the shadow ray from the light source towards the point in shadow intersects with this material. The shadow shader then changes the color of the ray, which is initially the (possibly attenuated) color of the light to another color, typically a darker or tinted color if the material is colored glass. It returns black if the material is totally opaque, which is also the default if no shadow shader is present. Shadow shaders are usually reduced versions of the material shaders; they evaluate transparencies and colors but cast no secondary rays.
It is possible to use the material shader as a shadow shader; material shaders can find out whether they are called as material or shadow shaders and do only the required subset in the latter case. The built-in soft_material shader is written this way. This is done by naming the material shader after the shadow keyword, and giving no parameters (i.e., giving ()). mental ray will notice the absence of parameters and pass the material parameters instead. If the shadow shader has no parameters of its own, it is not defined whether it receives a pointer to the material shader parameters, or a pointer to a copy of the material shader parameters.
A volume shader affects rays traveling inside an object. They are conceptually similar to fog or atmosphere shaders. When a ray (either from the eye or from a light source) hits this material, the shadow shader, if present, is called to change the color returned by the ray based on the distance the ray has traveled, and atmospheric or material parameters. A volume shader can also be named in the view (see view) (see below); that shader is used for rays traveling outside objects. It is the material shader's responsibility to determine inside and outside of objects.
Finally, the environment shader is called when a reflection or refraction ray cast by the material shader leaves the scene entirely without striking another object. There is a built-in environment shader soft_env_sphere, for example, that maps a texture on a sphere with an infinite radius surrounding the scene. (This is another example for an application of a texture; a texture name must be used as a parameter for the soft_env_sphere shader for this to work.) The view statement also offers an environment shader; that shader is used when the ray leaves the scene without ever striking any object (or exceeding the trace depth).
    view
        outputs
        viewdefs
    end view
A view describes the output files to be created, the camera, and options. More than one output file can be created, and output shaders such as filters can be listed that operate on the final rendered image, before it is written to a picture file. outputs is one or more output statements. There are two kinds of output statements:
    output ["datatype"] "filetype" "filename"
    output "datatype" "shader_name" (parameters)
The first kind writes a picture to a file named filename, using file format filetype. Normally, file formats imply a data type, but the defaults can be overridden by naming an explicit datatype. For example, the file type "pic", which stands for a SOFTIMAGE picture file, implies the data type "RGBA", but if the data type is explicitly set to "contour", contours instead of colored pixels will be written to the pic file. For a list of data types and file types, see the ``Output Shaders'' chapter in the ``Functionality'' section.
The second kind of output statement calls an output shader, such as a filter, that may operate on all available frame buffers. Here, the datatype may be a comma-separated list of types if the shader requires multiple frame buffers. For example, a shader that filters the RGBA image with a filter whose size depends on the distance of objects needs both the RGBA buffer and the depth buffer, and would have a data type "rgba,z". mental ray creates all types of frame buffers requested by at least one output statement of either kind.
There is a variety of viewdefs that can be listed in the view. Some of them define the camera, others add atmospheres or set options. Most of them can be overridden by specifying an appropriate command-line option; see the section Command Line Syntax. The following viewdefs are supported:
- focal distance|infinity
- The focal distance is set to distance. The focal distance is the distance from the camera to the viewing plane. The viewing plane is the plane in front of the camera that the rendered scene is projected onto; its edges correspond to the edges of the rendered image. However, objects between the camera and the viewing plane will still be rendered; a common approach is to place the viewing plane in the middle of the interesting objects in the scene and then set the aperture such that it is a bit larger than the horizontal extent of the objects in camera space. If infinity is used in place of the distance, an orthographic view is rendered. An orthographic view turns off perspective, all camera rays are parallel. View-dependent surface tessellation is not possible in orthogonal mode.
- aperture aperture
- The aperture is the width of the viewing plane. The height of the viewing plane is aperture divided by aspect. Together with the focal and aspect viewdefs, aperture defines the lens of the camera.
- aspect aspect
- This is the aspect ratio of the camera. The default is 1.33. In camera space, aperture is the width of the viewing plane and aperture divided by aspect is the height. The viewing plane is divided into pixels as specified by the resolution viewdef, so the aspect will result in nonsquare pixels if it is not equal to the X resolution divided by the Y resolution. For example, to render a PAL image at a resolution of 720 *576 pixels, at an image ratio of 3:4 as defined by the PAL standard, pixels are slightly wider than tall, by a factor of 576 /720 *4 /3 = 1.0667. If this number is specified as aspect, objects will appear undistorted on a PAL video display (but not on a computer display with square pixels).
- resolution xint yint
- Specifies the width and height of the output image in pixels.
- window x_lowint y_lowint
- x_highint y_highint Only the sub-rectangle of the image specified by the four bounds will be rendered. All pixels that fall outside the rectangle will be left black.
- transform a00 a10 a20
- a30 a01 ... a33 The transformation matrix transforms camera space to world space. It is made available to shaders that need world coordinates. It does not actually transform any geometry, the camera is always assumed to sit at the coordinate origin and look down the negative Z axis regardless of the transformation matrix. Rendering will not be affected if the transformation matrix is missing, but shaders can no longer do calculations in world coordinates; mental ray defaults to an identity matrix in this case.
- min samples minint
- This parameter determines the minimum sample rate. Each pixel is sampled at least 2^2 *min times. If min is 0, each pixel is sampled at least once. Positive values increase the minimum sample rate; negative numbers reduce the sample rate to less than one initial sample per pixel (infrasampling). min must be at least -2, which means that at least one sample per 4 *4 pixels is taken. -2 is the default. If min is chosen too small, small features may be lost if all samples happen to miss it (if it is found just once in any pixel of a task, mental ray will analyze the feature and render it correctly). If a filter view statement is used to set a filter other than box 1 1, min samples must be set to -1 or greater. If depth, normal, or label frame buffers are used by an appropriate output statement, the min samples parameter should be set to 0 or greater to avoid gaps.
- max samples maxint
- This parameter sets the maximum sample rate. If neighboring samples find a difference in contrast exceeding the contrast limit, the area that contains the contrast is subdivided until the maximum recursion depth specified by max is reached. At most 2^2 * max samples per pixel are taken. mental ray will also automatically analyze features once detected in one pixel, which permits choosing a very low minimum number of samples (such as -2) because if an feature is missed in one pixel, it might be found later and traced back into the earlier pixel. If a filter view statement is used to set a filter other than box 1 1, max samples must be set to 1 or greater.
- recursive on|off
- This flag controls the recursive sampling method that takes image samples at pixel corners, and recursively subdivides pixels into subpixels where contrasts exceeding the contrast threshold are detected. Recursive sampling uses the min samples and max samples parameters. It is enabled by default unless contour rendering or motion blurring is enabled. If it is disabled, the sampling method is chosen based on the adaptive parameter; see below.
- samples samplesint
- The samples parameter exists for backwards compatibility only. It sets the maximum number of samples to samples^2 for the non-recursive supersampling algorithm, which is currently used only when contour rendering or motion blurring is enabled. This parameter may be removed from later versions of mental ray.
- adaptive on|off
- The adaptive flag, like the samples parameter, is obsolete. If contour rendering or motion blurring is enabled, or if there is a recursive off statement, an algorithm that uses samples and adaptive is used. If adaptive is off, the number of samples is always samples^2; if it is on, the number of samples is either 1 or samples^2. The min samples and max samples offer a more flexible way of controlling the number of samples.
- contrast r g b [ a ]
- The contrast controls supersampling. If neighboring samples differ by more than the color r, g, b, a, supersampling is done as specified by the sampling parameters (see above). Default for a is the average of r, g, and b. The recursive supersampling algorithm controlled by min samples and max samples modifies the contrast based on the recursion level: at sample level 0, the contrast is used directly; at sample level 1, the contrast is doubled (effectively requiring a higher contrast to force another subdivision), and so on. Negative levels divide the contrast, i.e. use a fraction 1 /2, 1 /4, and so on. In general, the contrast is multiplied by 2^level at the supersampling level level, which is bounded by min samples and max samples.
- time contrast r g b [ a ]
- The time contrast controls temporal supersampling for motion blurred scenes. It works similar to the spatial contrast parameter explained above: If neighboring samples in time differ by more than the color r, g, b, a, supersampling is done. Default for a is the average of r, g, and b. Using values for time contrast that are higher than contrast can speed up motion blur rendering at the price of more grainy images without degrading the quality of spatial antialiasing.
- filter box|triangle|gauss width [height]
- The filter parameter specifies how multiple samples in recursive sampling mode are to be combined. The filter defaults to a box filter of width and height 1. The box filter can be replaced with a triangle filter or a gaussian filter centered on the pixel. The filter size in pixel units can also be specified; if no height is given the width is used. Larger filter sizes result in softer images. Typical values are 1.0 for box filters, 2.0 for triangle filters, and 3.0 for gaussian filters. The box filter sums all samples in the filter area with an equal weight The triangle filter functions has the shape of a pyramid centered on the pixel. The gauss filter weights the samples using a gauss curve which is cut off at an ellipse centered on the pixel; it has a spherical shape. Large sizes and filters other than box may reduce rendering speed. The filter sizes should not be smaller than 1.0. In order to use filters, the min samples parameter must be set to -1 or greater, and max samples must be set to 1 or greater, or a warning will be printed and the filter statement is ignored. Note that the sample defaults do not satisfy these conditions. The filter shapes of the three filters are:
- jitter jitter
- The jittering factor introduces systematic variations into sample locations. Without jittering, samples are taken at the corners of pixels or subpixels. Jittering displaces the samples by an amount calculated by lighting analysis, limited to jitter pixels. This is used to reduce artifacts. Jittering is turned off by default, or by specifying a jitter of 0.0. Jittering works best in ray tracing mode.
- shutter shutter
- This statement specifies the shutter open time. A shutter value of 0.0 turns motion blurring off, values greater than 0.0 turn motion blurring on. The shutter value scales the motion vectors attached to object vertices; if shutter is 1.0, each vertex moves the distance given by its motion vector, and is blurred in the image over this distance. Values less than 1.0 reduce this path.
- trace depth reflectint [refractint
- [sumint]] reflect limits the number of recursive reflection rays. If it is set to 0, no reflection rays will be cast; if it is set to 1, one level is allowed but a reflection ray can not be reflected again, and so on. Similarly, refract controls the maximum depth of refraction and transparency rays (which implement transparency with and without index of refraction). Additionally, it is possible to limit the sum of reflection and refraction rays with sum. For example, if 3 3 4 is given, an eye ray may be reflected 3 times, or refracted 3 times, or reflected twice and then refracted twice, or any other combination that sums up to at most 4. The defaults are 2 2 4.
- shadow_sort on|off
- This flag controls the way shadow shaders are called. Shadow shaders determine how much light from a light source passes through a shadow-casting object between the light source and an illuminated point on some other object. If the sorting flag is off (the default), the shadow shaders are called in random order. If sorting is on, the shadow-casting objects are sorted such that the shadow shader of the object closest to the light source is called first. This slows down rendering slightly, but is required if certain complex shaders such as fur shaders are used.
- acceleration spatial subdivision
- Selects the binary space partitioning (BSP) rendering algorithm. This algorithm is often, but by no means always, faster. It is controlled by the max size and max depth parameters.
- acceleration ray classification
- Selects the ray classification rendering algorithm. This algorithm is recommended for very large scenes. It operates with a constant acceleration memory size, controlled by the subdivision memory and subdivision view statements.
- max size sizeint
- The maximum number of primitives in a leaf of the BSP tree. This parameter is used only if binary space partitioning is enabled, it has no effect on the ray classification algorithm. Larger leaf sizes reduce memory consumption but increase rendering time. The default is 4.
- max depth depthint
- The maximum number of levels in the BSP tree. This parameter is used only if binary space partitioning is enabled. Larger tree depths reduce rendering time but increase memory consumption, and also slightly increase preprocessing time. The default is 25.
- subdivision subdivint subdiv_2dint
- mental ray uses a ray tracing algorithm that subdivides the space of all rays. The optimal subdivision is determined automatically by a built-in scene analysis. The subdivision parameter can be used to modify the result of this analysis; arguments of 0 leave the calculated subdivision unchanged, positive numbers increase and negative numbers reduce the subdivision. subdiv controls general subdivision; subdiv_2d controls primary (eye) and shadow rays. This option has no effect if the BSP algorithm is used.
- subdivision memory memoryint
- This parameter sets the amount of memory to be used by the ray space subdivision algorithm for acceleration data structures to memory megabytes on each CPU. It has no effect if the BSP algorithm is used. mental ray allows presetting the amount of rendering acceleration memory independently of scene complexity without sacrificing speed. The default is set to 6 megabytes, which is sufficient for most scenes. Even for extremely large scenes, little can be gained from memory sizes greater than 12 megabytes. Note that this parameter does not affect the amount of memory used for the scene description, which depends on the complexity of the geometry in the current frame. Compare also the memory command; see above.
- face front|back|both
- The front side of a geometric object in the scene is defined to be the side its normal vector points away from. By specifying that only front-facing triangles are to be rendered, speed can be improved because fewer triangles need to be tested for a ray. This works well unless there are objects whose back side is seen by refracted or reflected rays -- with face front, the back side would not be visible. The default is face both.
- clip hither yon
- The hither (near) and yon (far) planes are planes parallel to the viewing plane that delimit the rendered scene. Points outside the space between the hither and yon planes will not be rendered (this does not apply to the infinite-radius environment maps because they are not geometric objects). The clip statement specifies the distance of the hither and yon planes from the camera. The defaults are 0.0001 for the hither distance and 1000000.0 for the yon plane.
- volume "volume_shader_name"
- (parameters) This statement specifies a volume (atmosphere) shader (see volume shader) . The atmosphere affects all rays passing through the space outside objects by attenuating the color of the ray. It is possible to specify a volume shader for the inside of objects too, by naming a volume shader in the material statement (see above).
- environment "environment_shader_name"
- (parameters) This statement specifies an environment shader. Environment shaders control the color returned by primary rays that, after leaving the camera, never strike any object in the scene. They are similar to environment shaders named in materials, which control reflection rays cast by the material shader that leave the scene without striking another object (or exceeding the trace depth).
- lens "lens_shader_name"
- (parameters) Lens shaders (see lens shader) simulate lenses by changing the camera. If no lens shader is present, the camera is a pinhole camera that casts rays from the origin in all directions that pass through the viewing plane, or an orthographic camera that casts parallel rays if focal infinity is specified. A lens shader accepts the origin and direction of the camera ray, modifies them, and casts a new camera ray. Examples for lens shaders includes fish-eye lenses that exaggerate the direction vector in a nonlinear way (there is a code example in the Shader section). Multiple lenses can be specified in the view; the n-th lens shader receives the origin and direction computed by the n-1st lens shader.
- shadow on|off
- By default, shadows are enabled. The shadow statement in the view can be used to turn shadows off globally.
- trace on|off
- Normally, mental ray will use a combination of a scanline algorithm and ray tracing to calculate samples of the scene. If trace off is specified, ray tracing is disabled, and mental ray will rely exclusively on the scanline algorithm. Without ray tracing, reflection rays and refraction rays cannot be cast. However, scanline transparency that, unlike refractions, does not support changing the direction of the ray based on the index of refraction of the material, and environment maps will work when ray tracing is turned off. Ray tracing is turned on by default.
- scanline on|off
- This statement allows turning the scanline algorithm off to force mental ray to rely exclusively on ray tracing. This will slow down rendering in most cases. By default, scanline is turned on unless motion blurring, the BSP algorithm, or lens shaders are used.
- desaturate on|off
- If a first-generation material shader returns a color whose RGB components are outside the range [0, 1], mental ray will clip the color to a legal range. Negative component values are clipped to 0. If any of R, G, and B exceed 1, they are either set to 1 (if desaturation is turned off), or R, G, and B are faded towards white (if desaturation is turned on). Alpha is always set to 1 if it exceeds 1, or to the maximum of R, G, and B if any of them exceed alpha. Desaturation is turned off by default.
- dither on|off
- mental ray supports both 8 and 16 bits per color component. In some cases, 8 bits per pixel, as supported by all popular picture file formats, can cause visible banding when the floating-point color values calculated by the material shader are quantized to the 8-bit values used in the picture file. Dithering mitigates the problem by introducing noise into the pixel such that the round-off errors are randomly distributed. Note that this can cause run-length encoded picture files to be larger than without dithering. Dithering is turned on by default.
- gamma gamma_factor
- Gamma correction can be applied to rendered color pixels to compensate for output devices with a nonlinear color response. All R, G, B, and alpha component values are raised to gamma_factor. The default gamma factor is 1.0, which turns gamma correction off.
- field even|odd|both
- Field rendering is a technique that allows smooth animations on interlaced video displays. To reduce flicker, video displays first display only every other scanline of the picture, and then the remaining scanlines in a second sweep. Each sweep is called a field. Two fields are one frame. Since sweeps occur at one half of the frame rate, animated objects may have moved between sweeps. Not taking this into account results in rough animations. By default, mental ray renders full frames, resulting in a non-interlaced output picture. If field rendering is set to even, every consecutive pair of rendered frames is combined such that the first frame contributes the even scanlines (counted from the top), and the second frame contributes the odd scanlines. This is reversed if field rendering is set to odd. The decision of which frame is the first or second is based on the frame number; the first field has an odd frame number (usually 1). If field rendering is enabled, there must be an even number of frames in the input file.
- contour on|off
- If contour rendering is turned on, mental ray will render contour lines based on the visibility, self-occlusion, transparency, and normal vectors instead of color images. This option is useful for cartoon animation. Contour rendering is turned off by default. If it is turned on, the output statements at the beginning of the view statement must either specify PostScript output files ( filetype "ps"), or must specify an RGB or RGBA file type together with a datatype "contour".
- paper size "format"
- If contour rendering is turned on and the output is a PostScript file (see output statements above), format determines the paper size. Available paper sizes are a3, a4, a5, a6, b4, b5, b6, 11x17 (or b), letter (or a), executive, or legal. All paper size strings are case-insensitive. The default is 11x17.
- paper scale scale
- The paper scale is a correction factor for the size of the contour drawing on paper. The default is 1.0; numbers greater then 1.0 enlarge the drawing and numbers less than 1.0 reduce it.
- discontinuity angle
- Determines the angle discontinuity required to produce a contour line, in degrees. Any two triangles forming an angle of more than the specified number will produce a contour line segment between them. A value of 0.0 will outline every triangle. The default is 60.0.
- contour line width width
- This parameter determines the contour line width in points for PostScript output, and in pixels for picture output. The default is 0.5.
- contour depth depth
- The contour depth controls contours around occluded or self-occluding objects. A contour line will be drawn between two triangles in the same object if their z depths differ by more than depth. The depth is also used to decide whether to draw a contour line or not between two objects if only one of them has the nocontour flag set in its material. In this case, the Z depths of the two objects are compared, with depth being a threshold: if the two objects differ in Z by less than depth then --- assuming intersection or touching --- no contour line is drawn. If the two objects differ in z by more than depth, draw the contour line if contour generation for the foremost object is enabled; otherwise no contour line is drawn. depth must be positive. The default is 0.0.
- paper transform b d
- The paper transformation defines a transformation that corrects distortions introduced by the printer. The PostScript coordinates expressed in points are transformed according to the matrix (1 b 0 d). The default is the identical transformation, i.e. no distortion correction.
All geometry is specified in camera space. The camera is assumed to sit at the coordinate origin and points down the negative Z axis. The appearance such as color and transparency of objects is determined by naming materials in an object definition. Before a material can be used in an object, it must be defined; see above for details. Naming the material determines all aspects of the object's appearance. No further parameters, textures, or lights need to be specified; they are all part of the material definition.
The two most common approaches to materials and objects are to name all materials first and then all objects, which may simplify the implementation of material editors because all materials may be put in a separate file and then included in the .mi file using a $include command (see include command) ; or materials and objects may be interspersed as long as each material definition precedes its first use.
All objects, regardless of the geometry type, have a common format in the .mi file:
    object "object_name"
        [ visible ]
        [ shadow ]
        [ trace ]
        [ tag label_numberint ]
        [ transform a00 a10 a20 a30 a01 ... a33 ]
        [ basis list ]
        group
            [ merge epsilon ]
            vector list
            vertex list
            geometry list
        end group
        ...             # more groups
    end object
The individual parameters are:
- The object name object_name serves to uniquely identify the object. The name is not used by mental ray in any form except to give meaningful progress reports and error messages. Object names should be enclosed in double quotes to disambiguate them from reserved words.
- The visible flag causes the object to be visible. Most objects will have this flag set. Not setting it will make the object invisible to primary rays (those originating from the camera), which means it will disappear from the image.
- The shadow flag causes the object to cast shadows. The standard case is specifying both the visible and shadow flags. If an object is very complex, it may be desirable to set only the visible flag but not the shadow flag, and create a second object that resembles the first one but is much simpler and set the shadow but not the visible flag on it. The effect is that the object appears unchanged, but shadow calculations see a much simpler shadow object that casts about the same shadow as the primary visible object would.
- The trace flag serves a similar purpose as the shadow flag. Normally, it is always set along with the visible and shadow flags. It controls whether the object is visible to secondary (reflected or refracted) rays (see secondary ray) . If the reflecting or refracting objects are fuzzy or only slightly reflective or refractive, it may result in a considerable speedup to make the reflection and refraction rays see a much simpler object than primary rays would. Like with the shadow flag, this is achieved by not setting the trace flag in the primary, high-definition object, and create a second one that roughly resembles the primary object that has the trace flag (and perhaps the shadow flag) but not the visible flag set.
- The tag specifies an arbitrary 32-bit number that identifies the object. mental ray normally uses the term label, the keyword tag is retained for backwards compatibility. The term tag is used by mental ray to identify entries in the scene database; this is of concern only to shader writers. By specifying an appropriate output statement in the view (see above), it is possible to cause mental ray to write a label file that, for each pixel, contains the label code of the object that the camera ray hits first. Exactly which label is stored is under the control of the material shader; using the label of the foremost object regardless of reflections and refractions is merely the default behavior.
- The transform statement specifies the transformation matrix that defines the object space with respect to the internal space. (Coordinate spaces are explained in the Shader section.) Specifying the transformation allows material and texture shaders to do calculations in object space. For example, a 3D texture shader will normally work in object space to prevent the 3D texture from shifting between frames when the camera moves. If no transformation is specified, the identity matrix is used. The last row of the matrix is the translation.
- The basis list is a list of bases to be used in free-form surface descriptions. Only curves and surfaces use bases. For a list of supported bases, see below. The defined bases can be used in all groups that follow, until the end of the object.
- Finally, a list of groups contain the actual geometric representation. The decision whether to put all geometry into a single group or to use different groups for different geometric entities is of importance only for free-form surfaces. If two surfaces appear in the same group, they may be connected if the appropriate connect statements are used (see below) or if adjacency detection (edge merging) takes place. Surfaces in different groups cannot be connected. Connecting surfaces means that they will be approximated (see approximation) such that there is no crack between them; they will form one continuous combined surface in the range of the connection. The merge epsilon that can be specified in the group determines the maximum gap between two surfaces that still leads to the automatic connection of both surfaces. The smaller the epsilon, the closer any two surfaces must be to become merged. By default, the merge epsilon is 0.0 and no edge merging is computed.
mental ray also accepts a compressed binary format for vectors. Instead of three floating-point numbers, a sequence of 12 bytes enclosed in backquotes is accepted. These 12 bytes are the memory image of three floats in IEEE 854 format, in the endianness of the machine ray is running on. This format is intended for increasing translation and parsing speed when ray is connected to a native translator; it should not be used in files exchanged between machines or modified with text filters. Many editors refuse to edit files containing binary data.
Vertices build on vectors. In the .mi format, there is no syntactical difference between polygon vertices and control points vertices for free-form surfaces; both are collectively referred to as ``vertices'' in this discussion. All vertices define a point in space and optional vertex normals, motion vectors, and zero or more textures and basis vectors:
    v   indexint
    [ n indexint ]
    [ t indexint [ indexint indexint ] ]
    [ m indexint ]
    ...
- v
- specifies the point in space,
- n
- specifies the vertex normal (ignored when the vertex is used as a curve or surface control point),
- m
- specifies the motion vector (the distance the point moves during the shutter open time specified in the view statement), and
- t
- specifies a texture vertex with an optional X/Y basis vector pair for bump map calculation. There can be up to 64 t lines for any given v vertex. (The texture and basis vectors are ignored when the vertex is used as a curve or surface control point. Texture and basis information for surfaces is defined using a ``texture surface'', described below.)
Vertices themselves are numbered, independently of vectors. The first vertex in every group is numbered 0. The geometry description is referencing vertices by vertex index, just like vertices are referencing vectors by vector index. This results in a three-stage definition of geometry:
- 1.
- List of vectors
- 2.
- List of vertices
- 3.
- List of geometry
    object "twotri"
        visible
        group
            0.0 0.0 0.0
            1.0 0.0 0.0
            0.0 1.0 0.0
            1.0 0.0 0.0
            1.0 1.0 0.0
            0.0 1.0 0.0
            v 0
            v 1
            v 2
            v 3
            v 4
            v 5
            p "material_name" 0 1 2
            p "material_name" 3 4 5
        end group
    end object
The first three vectors are used to build the first three vertices, which are used in the first triangle. The remaining three vectors build the next three vertices, which are used for the second triangle. Two vectors are listed twice and can be shared:
    object "twotri"
        visible
        group
            0.0 0.0 0.0
            1.0 0.0 0.0
            0.0 1.0 0.0
            1.0 1.0 0.0
            v 0
            v 1
            v 2
            v 1
            v 3
            v 2
            p "material_name" 0 1 2
            p "material_name" 3 4 5
        end group
    end object
The order of vector references is noncontiguous to ensure that the second triangle is in counter-clockwise order. Two vertices are redundant and can also be removed by sharing:
    object "twotri"
        visible
        group
            0.0 0.0 0.0
            1.0 0.0 0.0
            0.0 1.0 0.0
            1.0 1.0 0.0
            v 0
            v 1
            v 2
            v 3
            p "material_name" 0 1 2
            p "material_name" 1 3 2
        end group
    end object
The need for sharing both vectors and vertices can be shown by specifying vertex normals:
    object "twotri"
        visible
        group
            0.0 0.0 0.0
            1.0 0.0 0.0
            0.0 1.0 0.0
            1.0 1.0 0.0
            0.0 0.0 1.0
            v 0 n 4
            v 1 n 4
            v 2 n 4
            v 3 n 4
            p "material_name" 0 1 2
            p "material_name" 1 3 2
        end group
    end object
In this last example, both vector sharing and vertex sharing takes place. The normal is actually redundant: if no normal is specified, mental ray uses the polygon normal. Defaulting to the polygon normal is slightly more efficient than interpolating vertex normals, if vertex normals are explicitly specified.
Two types of geometry can be contained in the geometry list, polygonal geometry and free-from surfaces. In the next sections the syntax of the definitions of polygonal geometry and free-form surfaces is described and illustrated by examples.
More than one geometry type may be present within a single group. Although this allows vector sharing and vertex sharing between different geometric types (say polygons and surfaces), it will actually slow the parsing stage and is thus not recommended. Future versions of mental ray may explicitly disallow sharing between different types of geometry. It is advised to use only one geometric type per group. The various types of geometry are described separately in the following sections.
Polygonal geometry consists of polygons. For efficiency reasons, mental ray distinguishes simple convex polygons from general concave polygons or polygons with holes. Both are distinguished by keyword:
    c "material_name" vertex_ref_list
    cp "material_name" vertex_ref_list
    p "material_name" vertex_ref_list
    p "material_name" vertex_ref_list hole vertex_ref_list ...
The c keyword selects convex polygons without holes. The results are unpredictable if the polygon is not convex. The cp keyword is a synonym for c for backwards compatibility; c should be used in new translators. The p keyword also renders concave polygons correctly, and allows specification of holes, using one or more hole keywords, each followed by a vertex_ref_list.
If all polygons within the same object group are simple convex polygons containing three sides (i.e. triangles), mental ray will pre-process them in a more efficient manner than non-triangular polygons.
A vertex_ref_list is a list of non-negative integers index that reference vertices in the vertex list of the group described in the previous section. The first vertex in the vertex list is numbered 0.
Any vertex index can be used in both polygon and hole vertex_ref_lists. A polygon with n vertices is defined by n index values in the vertex list following the material name. The order of the polygon vertices is important. A counter-clockwise ordering of the vertices yields a front-facing polygon (see back culling) . The vertex list of a hole may be ordered any way.
The material name must have been defined before the object definition that contains the polygon definition, in a statement like
    material "material_name"
        ...
    end material
In both cases, it is recommended to quote the material name to avoid conflicts with reserved words, and to allow arbitrary characters in the name. For a detailed description of material definitions, see the section on materials above.
The tessellation of polygons assumes that polygons are ``reasonably'' planar. This means that every polygon will be tessellated, but the exact subdivision into triangles does not attempt to minimize curvature. If the curvature is low, different tessellations cannot be distinguished, but consider the extreme case where the four corners of a tetrahedron are given as polygon vertices: the resulting polygon will consist of two triangles, but it cannot be predicted which of the four possible triangles will be chosen.
The behavior will be different for convex polygons without holes (cp keyword) and polygons which contain holes or are concave (p keyword). Convex polygons without holes are triangulated by picking a vertex on the outer loop and connecting it with every other vertex except its direct neighbors. If polygons are not flagged by the cp keyword but do not have any holes an automatic convexity test is performed and if they are indeed convex they are triangulated as described. Convex polygons with holes and concave polygons are triangulated by a different algorithm. In any case a projection plane is chosen such that the extents of the projection of the bounding box of the (outer) loop have maximal size. If the projection of the polygon onto that plane is not one-to-one the results of the triangulation will be erroneous.
Free-form surfaces are polynomial patches of any degree up to twenty-one.The algorithms used impose no inherent limit. The limit may be increased in future versions.Supported basis types include Bézier, Taylor, B-spline, cardinal, and basis-matrix form. Any type can be rational or non-rational. Patches can be explicitly or automatically connected to one another, or may be defined to contain explicitly defined points or curves in their approximation. Various approximation types including parametric, spatial, curvature-dependent, and camera-dependent are available. Surfaces may be bounded by a trimming curve, and may contain holes.
Surface geometry, like polygonal geometry, is defined by a series of sections. An object containing only surface geometry follows this broad outline:
    object "object_name"
        [ visible ]
        [ shadow ]
        [ trace ]
        [ tag label_numberint ]
        [ transform a00 a10 a20 a30 a01 ... a33 ]
        [ basis list ]
        group
            [ merge epsilon ]
            vector list
            vertex list
            [ list of curves ]
            surface
            [ list of texture or vector surfaces ]
            ...                         # more surfaces
            [ list of approximation statements ]
            [ list of connection statements ]
        end group
        ...                             # more groups
    end object
Curves, surfaces, approximations, and connections may be interspersed as long as names are defined before they are used. For example, a curve must come before the surface it is trimming, and an approximation must come after the surface to be approximated. Texture and vector texture surfaces must always directly follow the surface they apply to. The individual sections are:
- The basis list must be specified at the beginning of the object definition, just before the group begins. Bases defined in this section are referenced by name in the curve and surface definitions to specify their degrees and types (Bézier, B-spline, etc.).
- The vector list in the group is a list of (x, y, z) vectors used to build control points later. This section is the same as the vector section used to build vertices for polygonal geometry.
- The vertex list that follows the vector list builds control points out of the vectors. This also works like the vertex list for polygonal geometry, except that no normals and texture vertices can be defined here (i.e., no n or t statements may appear). Normals are defined implicitly by the surface, and textures are defined by texture surfaces instead as described below. Rational curves and surfaces specify additional weights at each vertex reference (see below).
- Curves may be defined and used as trimming curves, hole curves, and special curves. This section is optional; if no trimming curve is defined surfaces are untrimmed. Trimming a surface means to cut away portions that fall outside an outer boundary curve; holes cut away portions inside the hole curve. Special curves are curves that are always included in the tessellation; they can be used to define features like sharp creases that need to be tessellated consistently. Surfaces may also be connected along trimming curves.
- The surface geometry list consists of surface statements, much like polygonal geometry that consists of c and cp statements. A surface is defined by a surface statement, optionally followed by one or more texture surface or vector surface statements.
- Approximation (see approximation) statements give additional information about how a surface and its trimming and hole curves are to be approximated. Various modes such as parametric, curvature-dependent, and view-dependent approximations can be selected, along with the precision.
When surfaces and curves are present within an object group, it is mandatory that at least one basis has been defined within the object. Bases define the degree and type of polynomials (denoted by Ni,n below) to be used in the description of curves or surfaces. Curves and surfaces reference bases by name. Every surface needs two bases, one for the U and one for the V parameter direction. Both can have a different degree, but must have the same type (for example, rational Bézier in U and Cardinal in V is not allowed). There are five basis types:
    basis "basis_name" [ rational ] taylor degreeint
    basis "basis_name" [ rational ] bezier degreeint
    basis "basis_name" [ rational ] cardinal
    basis "basis_name" [ rational ] bspline degreeint
    basis "basis_name" [ rational ] matrix degreeint stepsizeint basis_matrix
A parametric representation may be either non-rational or rational as indicated by the rational flag. Rational curves and surfaces specify additional weights at each control point. The degree specifies the degree of the polynomials used in the description of curves or surfaces; recall that the degree of a polynomial is the highest power of the parameter occuring in its definition. When bases of degree 1 are used control points are connected with straight lines. Cardinal bases always have degree 3. The degree and the type combined determine the length of the parameter vector and the number of control points needed for the surface. The meaning of the parameter vector differs for the different basis types. This is described in detail below.
The supported polynomial types for curves and surfaces are bezier, bspline, taylor, cardinal and matrix.
taylor specifies the basis functions:
bezier specifies the basis functions:
cardinal specifies third degree curves and surfaces . The Cardinal splines, also known as Catmull-Rom splines, are most easily formulated as a conversion from Bézier form. If we let Bi,3(t) be the cubic Bézier basis functions (i.e., the above basis functions Ni,n(t) with n=3), then we may write the cardinal basis functions as
N0,3 = -1/6 B1,3(t)
N1,3 = B0,3(t) + B1,3(t) + 1 /6 B2,3(t)
N2,3 = 1 /6 B1,3(t) + B2,3(t) + B3,3(t)
N3,3 = -1 /6 B2,3(t)
bspline specifies a non-uniform B-spline representation whose basis functions are given by the following recursive definition:
0 otherwise
and
t-xi /xi+n-xi Ni,n-1(t)
+ xi+n+1-t /xi+n+1-xi+1 Ni+1,n-1(t)
where, by convention, 0/0 = 0. (x0,...,xq) is known as the knot vector. It must be specified through the parameter lists when using B-spline bases in curves and surfaces (see below).
A matrix (bi,j)0 <=i <=n,0 <=j <=n specifies the basis functions:
When a curve or surface is being evaluated and a transition from one segment or patch to the next occurs, the set of control points (the `evaluation window') used is incremented by the stepsize. The appropriate stepsize depends on the representation type expressed through the basis matrix and on the degree.
Suppose we are given a curve with k control points {v1, ..., vk}. If the curve is of degree n, then n+1 control points are needed for each polynomial segment. If the stepsize is given as s, then the (1+i)th polynomial segment, will use the control points {vis+1,...,vis+n+1}. For example, for Bézier curves s=n, whereas for Cardinal curves s=1. For surfaces, the above description applies independently to each parametric dimension.
The basis_matrix specifies the basis functions used to evaluate a parametric representation. For a basis of degree n the matrix must be of size (n+1)*(n+1). The matrix is laid out in the order b0,0, b0,1, ... , b0,n, ... , bn,n.
Note that the generalization to the rational case for all representations is admitted in all cases.
As an example, an object containing a nonrational Bézier surface of degree 3 in one parameter direction and degree 1 in the other parameter direction needs two bases defined at the beginning of the object like this:
    object "mysurface"
        visible
        basis "bez1" bezier 1
        basis "bez3" bezier 3
        group
            ...
The surface definition will reference the two bases by their names, bez1 and bez3.
A surface specifies a name and a list of control points. For both parametric dimensions it specifies a basis, a global parameter range, and a parameter list. Optionally, it specifies texture surfaces, trimming curves, hole curves, special curves and special points. Special curves and points are included as edges and vertices in the approximation (triangulation) of the surface.
        surface "surface_name" "material_name"
            "u_basis_name" range u_param_list
            "v_basis_name" range v_param_list
            hom_vertex_ref_list
            [ texture_surface_list ]
            [ surface_specials_list ]
The bases used in the definition of the surface must have been defined in the basis list of the object. The are referenced by their basis_names. Their ranges consist of two floating-point numbers specifying the minimum and maximum parameter values used in the respective direction.
The parameter_lists in the basis specifications define the number of patches of the surface and the number of control points. For bases of the types taylor, bezier, cardinal and matrix such a parameter_list consists of a strictly increasing list of at least two floating-point numbers. For bspline bases the parameter_lists specify the knot vector. If the B-spline basis to be used is of degree n the knot vector (x0,...,xq) must have at least q+1=2(n+1) elements. Knot values represent a monotone sequence of floating-point numbers but are not necessarily strictly increasing, i.e. xi <=xi+1. Moreover, they must satisfy the following conditions:
 (1)    x0 < xn+1
 (2)    xq-n-1 < xq
 (3)    xi < xi+n for 0<i<q-n-1
 (4)    xn <=tmin < tmax <=xq-n
where [tmin,tmax] is the range over which the B-spline is to be evaluated. Equation (1) demands that no more than n + 1 parameters at the beginning of the parameter list may have the same value. Equation (2) is the same restriction for the end of the parameter list. Equation (3) says that in the middle of the parameter list, at most n consecutive parameters may have the same value. To generate closed B-spline curves, it is often necessary to write a parameter list where the first n and last n parameters in the list produce initial and final curve segments that should not become part of the curve; in this case equation (4) allows choosing a start and end parameter in the range bounded by the first and last parameter of the parameter list.
The number of control points per direction can be derived from the number of parameters p, the degree of the basis n, and the step size s. Their total number can be calculated by multiplying the numbers taken from the following table for each of the U and V directions.
  type          min. no. of parameters  no. of control points

 Taylor          2                      (p - 1) *(n + 1)
 Bézier          2                      (p - 1) *n + 1
 cardinal        2                      p + 2
 basis matrix    2                      (p - 2) *s + n + 1
 B-spline        2(n+1)                 p - n - 1
Note that only certain numbers of control points are possible; for example, if the U basis is a degree-3 Bézier, the number of control points in the U direction can be 4, 7, 10, 13, and so on, but not 3 or 5. For B-spline bases of degree 3 the minimum number of parameters is 8 corresponding to 4 control points.
Each vertex reference in the hom_vertex_ref_list is an integer index into the vertex list of the current group in the object (index 0 is the first vertex). When the surface is rational, homogeneous coordinates must be given with the control points, by appending a floating-point weight to every vertex reference integer in the hom_vertex_ref_list. Weights are used only if the surface is rational but ignored otherwise. If a weight in a rational surface is missing, it defaults to 1.0. The surface specials list is used to define trimming curves, hole curves, special curves, and special points (vertex references). A surface may be further modified by approximation and connection statements, as described below.
For example, an object with a simple degree-3 Bézier surface can be written as:
     object "mysurface"
          visible
          basis "bez3" bezier 3
          group
               0.314772   -3.204608  -7.744229   # vector 0
               0.314772   -2.146943  -6.932366
               0.314772   -1.089277  -6.120503
               0.314772   -0.031611  -5.308641
               -0.660089  -2.650739  -8.465791   # vector 4
               -0.660089  -1.593073  -7.653928
               -0.660089  -0.535407  -6.842065
               -0.660089  0.522259   -6.030203
               -1.634951  -2.096869  -9.187352   # vector 8
               -1.634951  -1.039203  -8.375489
               -1.634951  0.018462   -7.563627
               -1.634951  1.076128   -6.751764
               -2.609813  -1.543000  -9.908914   # vector 12
               -2.609813  -0.485334  -9.097052
               -2.609813  0.572332   -8.285189
               -2.609813  1.629998   -7.473326

               v 0     v 1     v 2     v 3       # vertices
               v 4     v 5     v 6     v 7
               v 8     v 9     v 10    v 11
               v 12    v 13    v 14    v 15

               surface "surf1" "material"
                       "bez3"  0.0 1.0   0.0 1.0
                       "bez3"  0.0 1.0   0.0 1.0
                       0 1 2 3 4 5 6 7 8 9 10 11 12 13 14 15
          end group
     end object
First, 16 vectors are defined, each of which is used to build one vertex (control point). Next, a surface is defined that uses basis bez3 for both the U and V parameter directions. Since the surface is built from only one 4 *4 Bézier patch, the parameter vector after the basis range has only length 2. If there had been two patches in the U direction and three in the V direction, the bases would have been referenced as
                "bez3"  0.0 1.0 0.0 0.5 1.0
                "bez3"  0.0 1.0 0.0 0.33333 0.66667 1.0
Alternatively, the parameter vector may be given as
                "bez3"  0.0 2.0 0.0 1.0 2.0
                "bez3"  0.0 3.0 0.0 1.0 2.0 3.0
by changing the parameter range of the basis. This has no influence on the geometry of the surface, but generates UV texture coordinates in a different range (here, [0.0, 2.0] *[0.0, 3.0]). However, a different parametrization does affect the texture surface range (see below), and the range of trimming, hole, and special curves (which do not define their own ranges but borrow the range from the surface they apply to).
The optional surface_specials_list that completes the surface definition is a sequence of trimming curves, hole curves, special curves, and special points as described in the next section.
For a complete example including approximations and connections, refer to the end of this chapter.
A plain surface statement defines the geometry of the surface. If a texture is to be mapped on the surface, it is necessary to include texture surfaces. A texture surface defines a mapping from raw UV coordinates to texture coordinates as used by shaders. A vector texture is a variation of a texture surface that additionally defines basis vectors; it is used for bump mapping. Vector surfaces normally come in pairs because bump mapping normally needs perturbation directions for U and V.
The texture or vector texture directly following a surface defines texture space number 0, the next defines texture space number 1, and so on, exactly like the first t statement after the v statement in a vertex used for building polygonal geometry defines texture space number 0, the next t defines texture space number 1, and so on. Basically, texture and vector texture surfaces replace the t statements used by polygonal geometry, because attaching textures to control points that usually are not part of the surface is not useful.
Texture spaces is what ends up in the state->tex_list array where it can be accessed by texture shaders to decide which texture is mapped which way. Texture space 0 is the first entry in that array, which is used by the shader for the first texture listed in the texture list in the material definition. In general, there is one texture space per texture on a material, although shaders making nonstandard use of texture spaces could be written.
The syntax for texture surfaces is a simplified version of geometric surfaces. The texture_surface_list in the grammar summary at the beginning of the ``Surfaces'' section above expands to zero or more copies of the following block:
        [ vector ] texture
            "u_basis_name" u_param_list
            "v_basis_name" v_param_list
            vertex_ref_list
Unlike geometric surfaces, no surface name and material name is given. Bases are given like in geometric surfaces. Texture surfaces use the ranges of the geometric surface they are attached to, they are not repeated in the texture surface basis statements. The vertex_ref_list follows the same rules as the geometric surface's vertex_ref_list. Texture surfaces have no specials such as trimming curves or holes.
The optional vector keyword in the texture surface definition is a flag that causes bump basis vectors to be calculated during tessellation. This flag must be used if the texture surface is used for a bump map; all built-in shaders supporting bump maps expect a pair of bump basis vectors and thus, a pair of vector texture surfaces.
This is an example for the simplest of all texture surfaces, a bilinear mapping:
    object "mysurface"
        visible
        basis "bez1" bezier 1
        basis "bez3" bezier 3
        group
            16 vectors used for the surface
            0.0 0.0 0.0         # vector number 16
            0.0 1.0 0.0         # vector number 17
            1.0 0.0 0.0         # vector number 18
            1.0 1.0 0.0         # vector number 19
            16 vertices used for the surface
            v 16                # vertex number 16
            v 17                # vertex number 17
            v 18                # vertex number 18
            v 19                # vertex number 19
            surface "surf1" "material"
                "bez3"  0.0 1.0 0.0 1.0
                "bez3"  0.0 1.0 0.0 1.0
                0 1 2 3 4 5 6 7 8 9 10 11 12 13 14 15
                texture
                    "bez1"  0.0 1.0
                    "bez1"  0.0 1.0
                    16 17 18 19
        end group
    end object
This texture surface defines a bilinear mapping from the UV coordinates computed during surface tessellation to the texture coordinates. To define other than bilinear mappings, the texture surface needs to have more control points than just one at every corner of the surface. Whenever the surface tessellator generates a triangle vertex, it uses the UV coordinate of that vertex to look up the texture surface and interpolate the texture coordinate from the nearest four points of the texture surface. The resulting texture coordinate is stored with the vertex and becomes available in state->tex_list when the material shader is called because a ray has hit the surface.
If more than one texture surface is given, one texture coordinate is computed for each texture surface and stored in sequence in the generated triangle vertices. Each texture surface is said to define a ``texture space''. They are available in the state-> tex_list array in the same order. The number and order of texture surfaces should agree with the number and order of textures given in the texture list in the material definition. (Note that not all material shaders support multiple textures.)
Curves are two-dimensional parametric curves which are referenced by surfaces. They are used as trimming curves, hole curves, and special curves. They must be defined before the surface which references them. A curve is defined as:
        curve "curve_name" "basis_name"
            parameter_list
            hom_vertex_ref_list
            [ special special_point_list ]
The parameter_list of a curve is a list of monotonically increasing floating-point numbers that define the number of segments of the curve and the number of control points. Curve parameter lists work very much the same way as surface parameter lists except that no range needs to be provided, because they are supplied by the surfaces that reference the curve under consideration as explained in the next section. For details on parameter lists, see the sections on bases and surfaces above.
Each vertex reference in the hom_vertex_ref_list is an integer index into the vertex list of the current group in the object (index 0 is the first vertex), optionally followed by a floating-point weight. Weights are used only if the curve is rational, they are ignored otherwise. If a weight in a rational curve is missing, it defaults to 1.0. The vertices indexed by the integers in the hom_vertex_ref_list should have no normals or textures (no n and t statements), and the third component of the vector (v statement) should be 0.0 because curves are defined in UV space, not 3D space.
The optional special_point_list specifies points that are included in the approximation of the curve. After the special keyword, a sequence of integers follows that index into the vertex list, just like the integers in the hom_vertex_ref_list. The first component of the vector is used as the t parameter; it forces the point on the curve at parameter value t to become part of the curve approximation. Of course t must be in the range of parameters allowed by the surface definition.
Trimming, Hole, and Special Curves; Special Points
A surface may reference curves to trim the surface, to cut holes into it, and to specify ``special curves'' that become part of the tessellation of the surface. Special points in surfaces work like special points in curves, except that they provide a point in the parameter range of the surface, i.e. a two-dimensional UV coordinate, rather than a one-dimensional curve parameter. They specify single points on the surface that are to be included in the tessellation. As all curves and points are in UV space, the third component of the vectors provided for them is ignored. None of the above types of curves and points may exceed the range of (0.0, 1.0) at any point.
No two curves may intersect each other, and no curve may self-intersect. This is an important point, because trimming curves and holes that are not closing or intersecting themselves or other loops are hazardous for the tessellation routines.
Trimming, hole, and special curves and special points are defined at the end of the surface definition. The curves are composed of segments from the list of curves of the surface's group. The surface_specials_list given in the previous section is a list of zero or more of the following four items:
    trim    "curve_name" min max
            ...
    hole    "curve_name" min max
            ...
    special "curve_name" min max
            ...
    special vertexint
            ...
The dots indicate that each trim, hole, and special statement may be followed by more than one curve segment resp. vertex.
The vertex integers specify vertices from the vertex section of the current group in the current object. Such a vertex specifies the UV coordinate of the special point that is to be included in the tessellation.
Each of the three types of curves references a curve that has been defined earlier with a curve statement. If a single trim, hole, or special statement is followed by more than one curve, the resulting trimming, hole, or special curve is pieced together by concatenating the given curves. The min and max parameters allow using only part of the curve referenced. min and max must be in the range of the parameter vector of the curve which in turn must be mapped into the parameter range of the surface. The min and max parameters of two different curve pieces are independent, they only depend on the curve parameter lists. For example, a trimming curve can be built from two curves, using the first three quarters of the first curve and the last three quarters of the second curve:
    curve "trim1"
            "bez1" 0.0 1.0 2.0 3.0 4.0
            0 1 2 3 4

    curve "trim2"
            "bez1" 0.0 1.0 2.0
            3 5 0

    surface "patch1" "mtl"
            "bez3" 0.0 1.0        0.0 1.0
            "bez3" 0.0 1.0        0.0 1.0
            6 7 8 9 10 11 12 13 14 15 16 17 18 19 20 21
            trim "trim1" 0.0 3.0
                 "trim2" 0.5 2.0
Both trimming curves use the basis bez1, which is assumed to be a degree-1 linear curve. Hence, trim1 connects the UV vertices 0, 1, 2, 3, and 4 with straight lines, and trim2 connects the vertices 3, 5, and 0. If these two curves are put together by the trim statement in the surface definition, all parts of the surface that fall outside the polygon formed by the UV vertices 0, 1, 2, 3, and 5 are trimmed off. The trim2 curve includes vertex 0 to close the trimming curve. Holes (see hole curve) and special curves are constructed exactly the same way. Trimming curves and holes must form closed loops but special curves are not restricted in this way.
This example omits the vector and vertex parts of the group in the object. Here is an example that defines a complete object containing a surface with a trimming curve that precisely follows the outer boundary. A trimming curve that follows the outer surface boundary does not actually clip off any part of the surface, but it is still useful if surfaces are to be connected, because connections work on trimming curves.
    object "mysurface"
        visible
        basis "bez1" bezier 1
        basis "bez3" bezier 3
        group
            16 vectors used for the surface
            0.0 0.0 0.0         # vector number 16
            1.0 0.0 0.0         # vector number 17
            1.0 1.0 0.0         # vector number 18
            0.0 1.0 0.0         # vector number 19
            16 vertices used for the surface
            v 16                # vertex number 16
            v 17                # vertex number 17
            v 18                # vertex number 18
            v 19                # vertex number 19
            curve "trim1"
                "bez1" 0.0 0.25 0.5 0.75 1.0
                16 17 18 19 16
            surface "surf1" "material"
                ...
                trim "trim1" 0.0 1.0
        end group
    end object
The trimming curve in the example is linear, using a degree-1 Bézier basis. This means that the parameter vector has five equally-spaced parameters, one for each corner in counter-clockwise order and back to the first corner to close the trimming curve. Trimming and holes always require a closed curve or sequence of curves (they can be pieced together by multiple curves as long as the pieces form a closed loop together). The results are undefined if trimming or hole loops are not closed, or intersect.
If the trimming curve would be a degree-3 Bézier going through four corner points, a parameter vector with 3 *5 + 1 = 16 parameters would be required (again, the 5 is the number of corners visited including the return to the first to close the curve).
For details on the parameter vector following the basis name in the definition of the curve, refer to the section on curves above. The bases and parameter vectors for curves and surfaces follow the same rules, except that curves have no explicit range; they always use the implicit range given by the parameter list.
Approximations are defined within a group and they specify how previously defined surfaces and curves should be tessellated. Approximation statements are given separately for the surface itself and for the trimming curves used by the surface. In both cases, the names of one or more surfaces are named; ``trim'' approximations apply to all trimming, hole, and special curves used by the named surface. Approximation statements never name a curve directly. There are three surface and three trim approximation methods:
     approximate surface parametric
                     u_subdiv [ v_subdiv ] "surface_name" ...
     approximate surface spatial [ view ]
                     edge [ minint maxint ] "surface_name" ...
     approximate surface curvature [ view ]
                     dist angle [ minint maxint ] "surface_name" ...
     approximate trim parametric
                     subdiv "surface_name" ...
     approximate trim spatial [ view ]
                     edge [ minint maxint ] "surface_name" ...
     approximate trim curvature [ view ]
                     dist angle [ minint maxint ] "surface_name" ...
     approximate surface parametric u_subdiv [ v_subdiv ] "surface_name" ...
     approximate surface spatial [ view ] edge [ minint maxint ] "surface_name" ...
     approximate surface curvature [ view ] dist angle [ minint maxint ] "surface_name" ...
     approximate trim parametric subdiv "surface_name" ...
     approximate trim spatial [ view ] edge [ minint maxint ] "surface_name" ...
     approximate trim curvature [ view ] dist angle [ minint maxint ] "surface_name" ...
The dots indicate that there may be more than one surface_name following the approximation statement. The given approximation is then used for all named surfaces.
Parametric approximation subdivides the surface into u_subdiv *degree equal-sized pieces in the U parameter direction, and v_subdiv *degree equal-sized pieces in the V parameter direction. If v_subdiv is omitted, it defaults to u_subdiv. Note that the factor is a floating point number, although a patch can obviously only be subdivided an integral number of times. For example, if a factor of 2.0 is given and the surface is of degree three, each patch will be subdivided six times in each parametric direction. If a factor of 0.0 is given, each patch is approximated by two triangles.
Curves are subdivided in subdiv *degree equal pieces.
Spatial approximation subdivides the surface or curve such that no edge length of the tessellation exceeds the edge parameter. edge is given as a distance in camera space, or as a fraction of a pixel diagonal in raster space if the view keyword is present. The min and max parameters, if present, specify the minimum and maximum number of recursion levels of the adaptive subdivision.
Curvature-dependent approximation specifies the maximum distance dist between the tessellation and the actual curve or surface, and the maximum angle angle between normals of adjacent tiles of the surface tessellation or between tangents of adjacent segments of the curve approximation. As a starting point, a small distance such as 0.1 and a large angle such as 45.0 is recommended. The value of dist is a distance in camera space, or a fraction of a pixel diagonal in raster space if the view keyword is present. The min and max parameters, if present, specify the minimum and maximum number of recursion levels of the adaptive subdivision.
If no approximation statement is given the parametric technique is used as a default with u_subdiv = v_subdiv = 1 for surfaces, or subdiv = 1 in the case of curves.
Connections may be defined within a group to specify the connection between two surfaces along intervals of their respective trimming curves. They may be used in place of or in addition to the edge merging performed on the group level. A connection is defined as:
    connect "surface_name1" "curve_name1" min1 max1
            "surface_name2" "curve_name2" min2 max2
This statement connects two surfaces surface_name1 and surface_name2 by connecting their trimming curves curve_name1 and curve_name2. The curves are connected only in the range (min1 ...max1) and (min2 ...max2), respectively. Only surfaces that have trimming curves can be connected by an explicit connect statement; for an example for a simple trimming curve that goes around the edge of a surface see the section on curves above. Trimming curves used in connections must satisfy three conditions:
- The trimming curve or sequence of trimming curves must be closed.
- It does not matter whether the trimming curve is oriented clockwise or counterclockwise, but if a sequence of trimming curves is used all pieces must have the same direction.
- The trimming curves along the connected range must run in the same direction in 3D space.
Here is an example of two surfaces that meet along one of their edges such that a gap remains. A connection is used to close the gap. The four control points defining the straight trimming curves that are connected are marked as
#0, #1, #2, and #3; the control points of the second
surface marked (*) have been modified slightly to create the gap. This is a complete .mi file that can be rendered directly.
    verbose on
    $include <softimage.mi>
    frame 1

    light "point" "soft_point" (
         "color"  1.0 1.0 1.0,
         "factor" 1.0)
         origin   140.189178 83.103180 50.617714
    end light

    view
         output "pic" "x.pic"
         focal 50.000000
         aperture 44.724029
         aspect 1.179245
         resolution 500 424
    end view

    material "mtl" opaque
        "soft_material" (
            "mode"          2,
            "shiny"         50.000000,
            "ambient"       0.500000 0.500000 0.500000,
            "diffuse"       0.700000 0.700000 0.700000,
            "specular"      1.000000 1.000000 1.000000,
            "ambience"      0.300000 0.300000 0.300000,
            "lights"        ["point"])
    end material

    object "obj"
        visible shadow trace
        basis "bez1" bezier 1
        basis "bez3" bezier 3
        group "example"
            0.314772    -3.204608   -7.744229
            0.314772    -2.146943   -6.932366
            0.314772    -1.089277   -6.120503
            0.314772    -0.031611   -5.308641    #0
            -0.660089   -2.650739   -8.465791
            -0.660089   -1.593073   -7.653928
            -0.660089   -0.535407   -6.842065
            -0.660089   0.522259    -6.030203    #1
            -1.634951   -2.096869   -9.187352
            -1.634951   -1.039203   -8.375489
            -1.634951   0.018462    -7.563627
            -1.634951   1.076128    -6.751764    #2
            -2.609813   -1.543000   -9.908914
            -2.609813   -0.485334   -9.097052
            -2.609813   0.572332    -8.285189
            -2.609813   1.629998    -7.473326    #3

            0.000000    0.000000    -5.000000    #0 (*)
            1.224400    0.561979    -6.081950
            2.134028    1.155570    -6.855258
            3.043655    1.749160    -7.628566
            -0.500000   0.700000    -6.000000    #1 (*)
            0.249538    1.115849    -6.803511
            1.159166    1.709439    -7.576819
            2.068794    2.303029    -8.350128
            -1.200000   1.000000    -7.000000    #2 (*)
            -0.725323   1.669719    -7.525073
            0.184305    2.263309    -8.298381
            1.093932    2.856899    -9.071690
            -2.000000   2.000000    -7.500000    #3 (*)
            -1.700185   2.223588    -8.246634
            -0.790557   2.817178    -9.019943
            0.119071    3.410769    -9.793251

            0.0     0.0     0.0
            1.0     0.0     0.0
            1.0     1.0     0.0
            0.0     1.0     0.0

            v 0  v 1  v 2  v 3  v 4  v 5  v 6  v 7
            v 8  v 9  v 10 v 11 v 12 v 13 v 14 v 15

            v 16 v 17 v 18 v 19 v 20 v 21 v 22 v 23
            v 24 v 25 v 26 v 27 v 28 v 29 v 30 v 31

            v 32 v 33 v 34 v 35

            curve "curve1"
                 "bez1" 0.0 0.25 0.5 0.75 1.0
                 32 33 34 35 32

            curve "curve2"
                 "bez1" 0.0 0.25 0.5 0.75 1.0
                 32 35 34 33 32

            surface "patch1" "mtl"
                 "bez3" 0.0 1.0        0.0 1.0
                 "bez3" 0.0 1.0        0.0 1.0
                 0 1 2 3 4 5 6 7 8 9 10 11 12 13 14 15
                 trim "curve1" 0.0 1.0

            surface "patch2" "mtl"
                 "bez3" 0.0 1.0        0.0 1.0
                 "bez3" 0.0 1.0        0.0 1.0
                 16 17 18 19 20 21 22 23
                 24 25 26 27 28 29 30 31
                 trim "curve2" 0.0 1.0

            approximate surface parametric 1.0 1.0 "patch1"
            approximate surface parametric 1.0 1.0 "patch2"
            approximate trim    parametric 1.0     "patch1"
            approximate trim    parametric 1.0     "patch2"

            connect "patch1" "curve1" 0.25 0.5
                    "patch2" "curve2" 0.0  0.25
        end group
    end object
    end frame
Note that the trimming curves curve1 and curve2 have a different orientation, one clockwise and one counterclockwise, because their control point lists are in a different order. This means that where both trimming curves run in parallel, they run in the same direction in 3D space, which is a required condition for trimming curves to be connected. The trimming curves must be closed (another condition) and so run around all four edges of the (square) surfaces. Since only one edge of each surface is connected to the other, the connection ranges select only one quarter ( 0.5 ...0.25 and 0.25 ...0.0) of each curve.
The example produces the following image, once rendered without and then with the connect statement:
The example produces the following image, once rendered without and then with the connect statement:
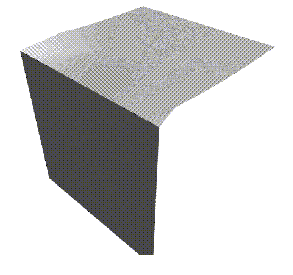
Table of Contents